Top Tips: Window Light Portraits
Using window light is a great way to start shooting portraits with your Sony Alpha camera. You don’t need any special equipment, and simple items such as pieces of card and fabric can be used to modify the light.
Before photography, artists would use high windows in studios to light their subjects, using many of the same rules we still use for lighting today, such as placing your subject at 45 degrees to the light and using a black cloth to control how the light hit the subject and background. With the excellent performance of Sony camera sensors, shooting stunning portraits using just natural light from a window is possibility like never before.
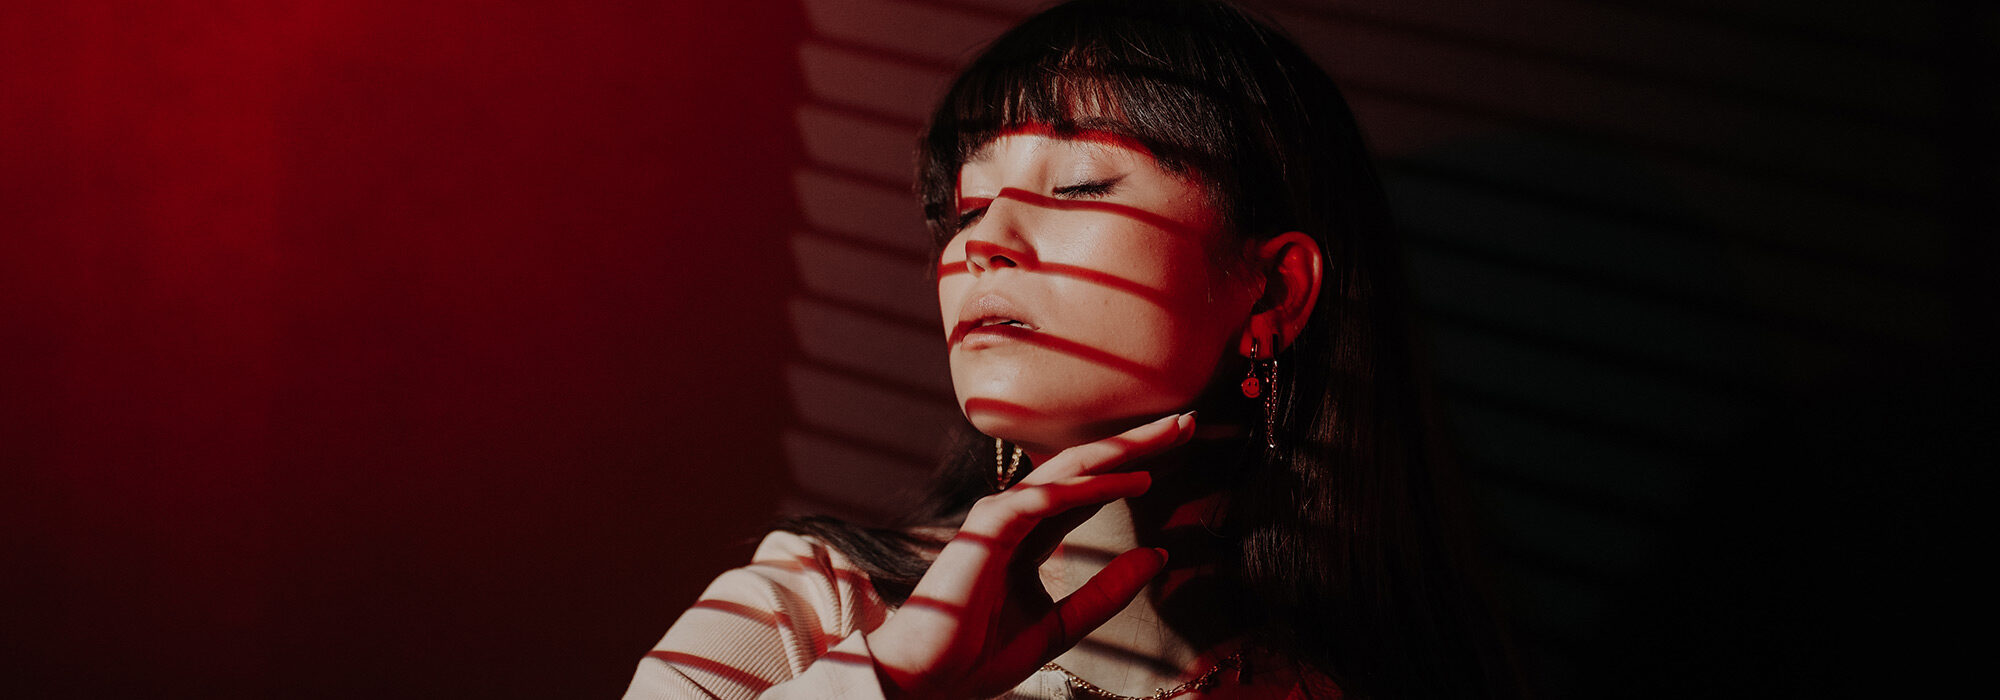
 © Vasil Nikolov | Sony α7R III + FE 100mm f/2.8 STF GM OSS | 1/200s @ f/5.6, ISO 500
Window Direction
The direction that the window faces is important. Artists favoured north-facing windows as they never received direct sunlight, meaning that the light would be soft and consistent for long portrait sessions. East-facing windows offer low-angle, high-contrast light in the morning, and west-facing windows provide the same light later in the day. South-facing windows can be too bright, especially in summer. Generally, north-facing is best because you want soft, flattering light, but don’t be scared of leaning into the high contrast effect that early morning and late afternoon sunlight can offer.
 © David Nassim | Sony α7 IV + FE 50mm f/1.4 GM | 1/40s @ f/1.4, ISO 100
Modify the light
If the light from a window is too harsh, you can change it quite easily to make it softer. Sheer curtains are an obvious solution that you may already have fitted. Another temporary solution is to tape a white cotton sheet to the window - this effectively turns the window into a huge softbox.
If the light is still too hard on the subject's face, you can use a reflector or a sheet of white card to reflect light. Conversely, if you want to add more contrast, use a piece of black card or a board with a black sheet draped over it to cut down on any reflection on the subject.
Moving your subject at different distances from the window can also affect how the light looks on the subject. The contrast between highlights and shadows increases as your subject moves closer to the window. Moving away softens the light, thus lowering contrast.
 © Kate Kirkman | Sony α9 + FE 85mm f/1.4 GM | 1/400s @ f/1.8, ISO 200
Lens choice
Focal lengths between 85-105mm and apertures of f/2.8 or larger are favoured for portraits, and Sony has some great lens options in this range. The FE 85mm f/1.4 GM II is a high-end choice, while the FE 85mm f/1.8 is more affordable. The FE 100mm F/2.8 STF GM OSS creates a beautiful soft bokeh, thanks to the Smooth Transition Focus, and is ideal for portraits. However, the 50mm focal length is often the best option due to space constraints, with the FE 50mm f/1.8 lens being a fantastic budget-friendly lens choice with great image quality.
Face Priority Exposure
The easiest way to expose your portraits perfectly is to use the Face Priority in Multi Metering. Multi Metering will adjust the exposure to any person's face in the frame. This setting can be turned on by going to MENU - (Exposure/Colour) - [Metering] - [Face Priority in Multi Metering].
 © Nemanja Maraš | Sony α7 III + FE 85mm f/1.8 | 1/160s @ f/2.8, ISO 400
Aperture and Depth of Field
You will want to set an aperture as large as possible to capture maximum light. However, depending on the look you want and how close you are to your subject, consider the depth of field. If the depth of field isn’t large enough, you may not get all of the subject's face in focus. You may also want to feature the room's background to help set the scene and contextualise the subject. In this case, you need a smaller aperture for a deeper depth of field.
To expose the image quickly, set your camera to Aperture Priority and the ISO to AUTO, then set a minimum shutter speed. To do this, go to MENU - (Camera Settings) - [ISO AUTO Min. SS] - then set the shutter speed to 1/60th or 1/25 sec. This should help keep your subject sharp even if they move slightly whilst posing.
With Face Priority, Aperture Priority and Auto ISO, you should be able to shoot away without worrying about the exposure. Just use the aperture to alter the depth of field.
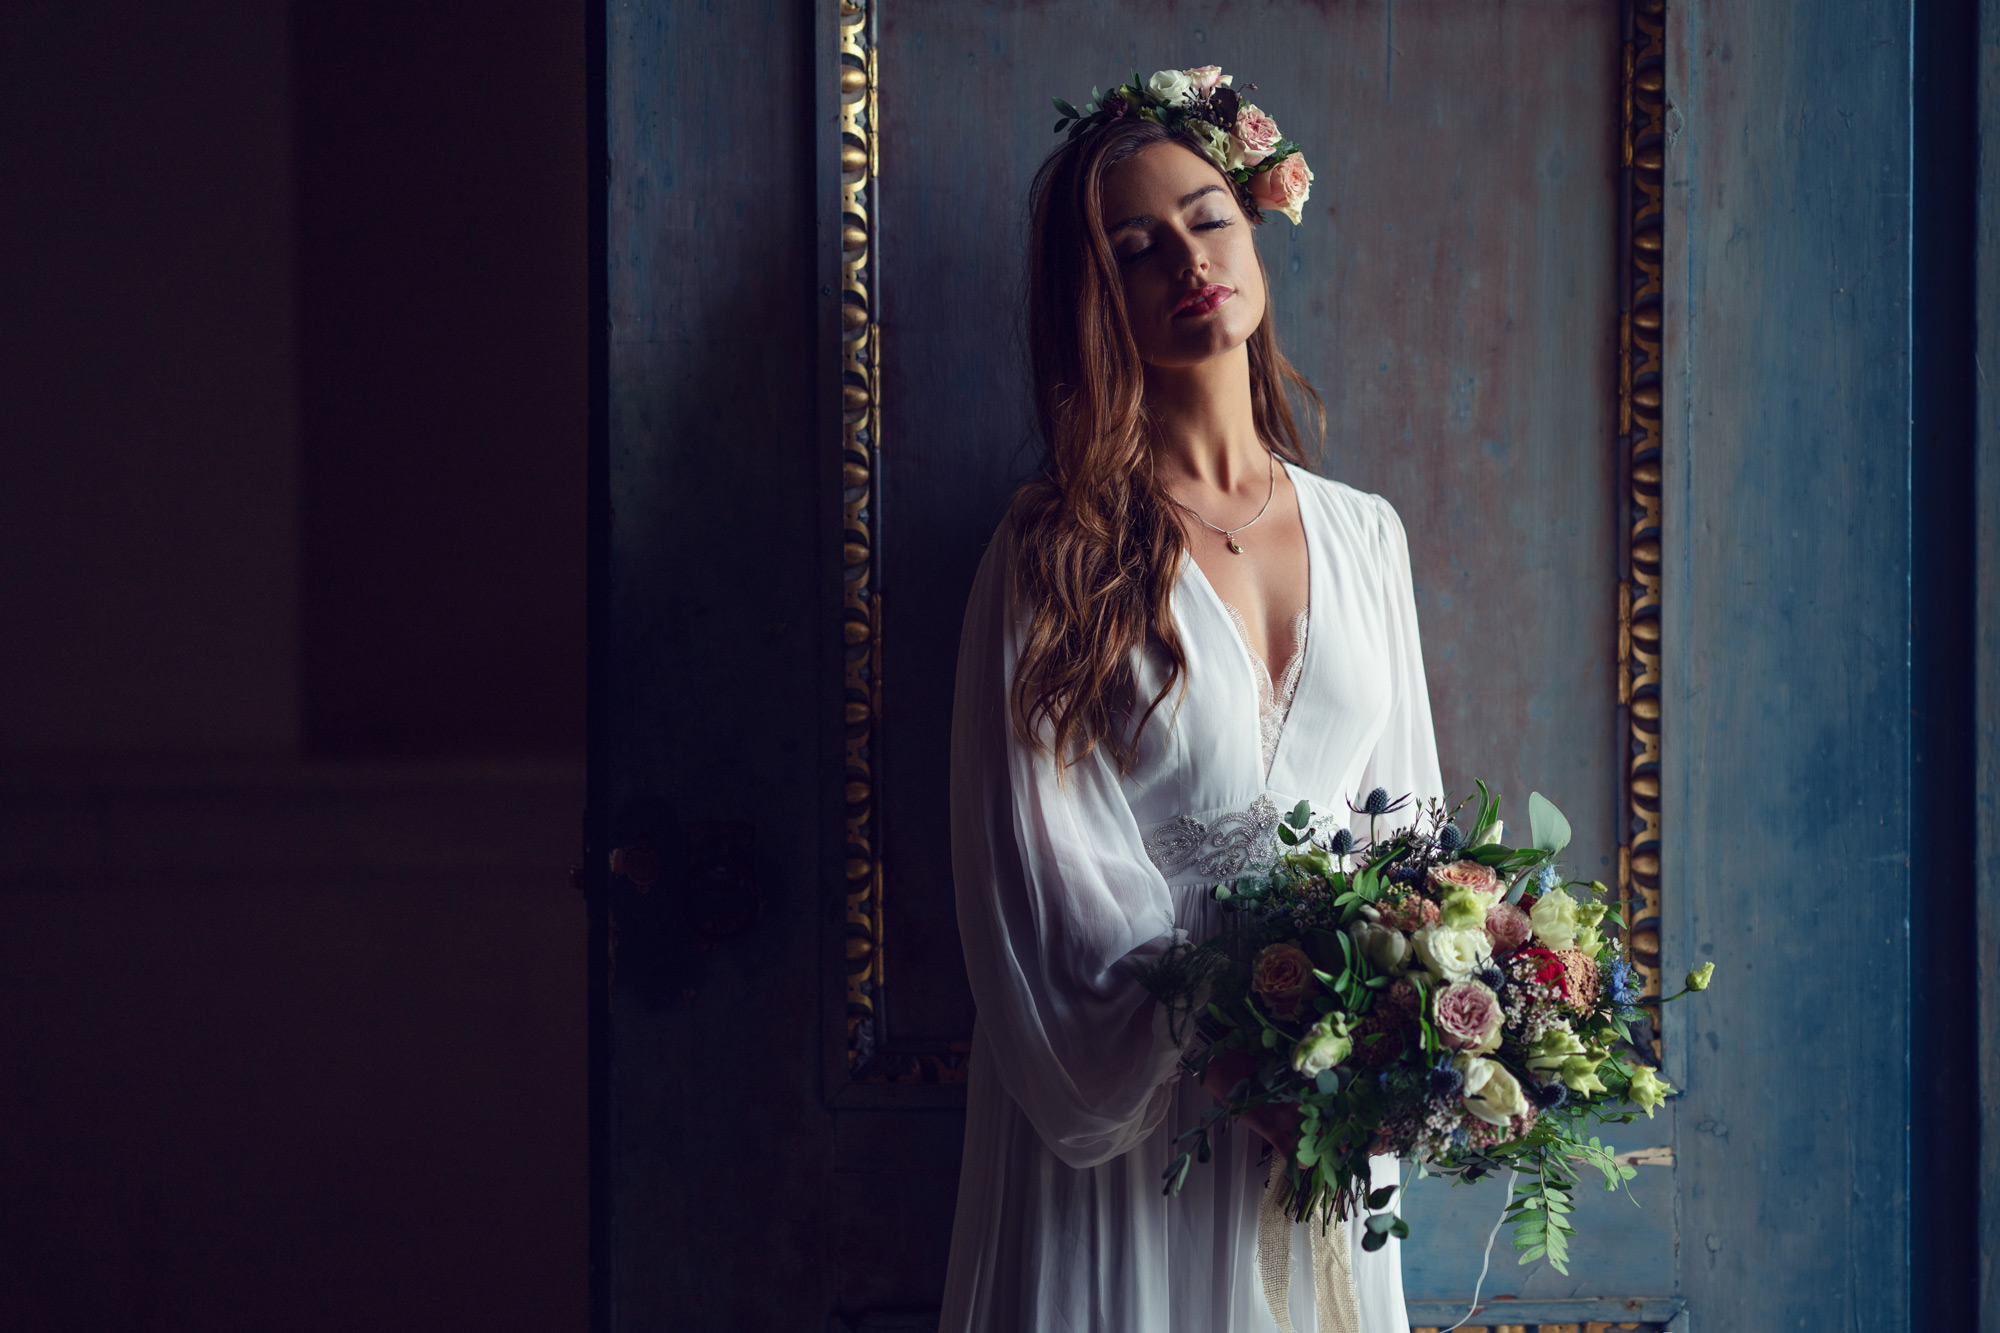
 © David Bastianoni | Sony α7 IV + FE 50mm f/1.2 GM | 1/200s @ f/2.0, ISO 100
Posing Your Subject
As for posing your subject, sit them positioned 45 degrees to the light. Then, ask your subject to move their body and head, looking in different directions. Watch how the light falls on their face, and be ready to ask them to hold the pose while taking a photo. Use the screen of your Sony Alpha camera and remain in conversation with your subject and guide them. With Face Detection autofocus, you can trust the Alpha camera to get the shot, meaning you can concentrate on watching how the light falls on the subject and directing them.
Summary
- Use window light to get started with portrait photography
- Modify the light by using a white sheet or reflectors
- Remember, you have to move your subject around to change the effect the light is having on them
- Use an 85, or 100mm lens, or if you are in a tight space, try a 50mm lens such as the FE 50mm f/1.8
- Set Face Priority exposure to get perfect exposures of the face
- Use an Aperture Priority and Auto ISO with a minimum shutter speed of 1/60 sec


