Top Tips: Perfectly Sharp Portraits
with your Sony Alpha camera
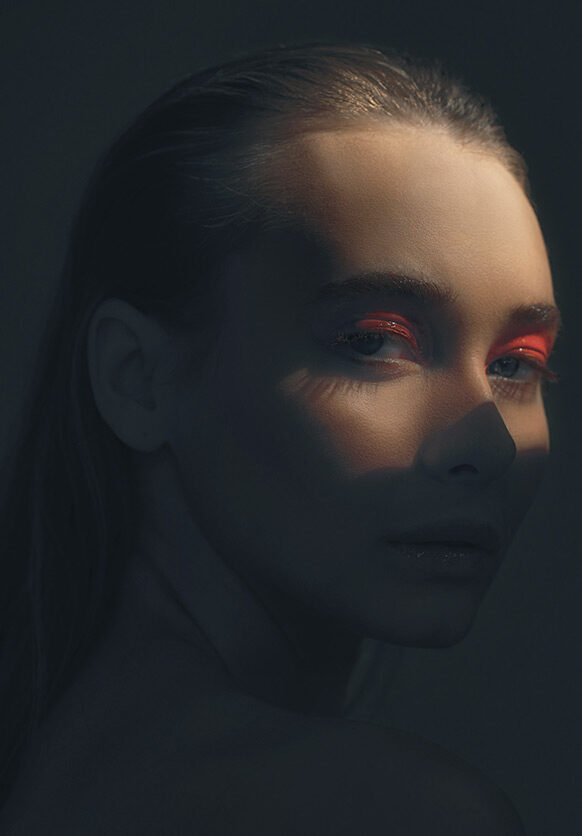
Eye AF Tracking
If there is one feature that has revolutionised portrait photography, it is the Eye AF, which is found in all the latest Sony Alpha cameras. Using the Bionz processing system, the camera will detect human eyes and focus the lens on the eye that is nearest to the camera. To activate Eye AF, ensure that you are in continuous autofocus mode (AF-C) and that Eye AF has been selected within the menu. Through the viewfinder or on the rear screen, you will see a small square overlaid on the subject's eye. As the subject moves, so will the eye detection square, meaning you can direct your subject or recompose your shot, knowing their eye will always be in focus.
Extra Tip: If you want to get creative with your depth of field and have a particular eye in focus every time, you can select either Left or Right eye in the Eye AF menu.
 © Pepa Valera | Sony α7 IV + FE 70-200mm f/4 Macro G OSS II | 1/125s @ f/4.0, ISO 400
Lens Choice
A fixed focal length lens is always the best choice to capture the ultimate detail. The pinnacle for shooting portrait images is the Sony FE 85mm f/1.4 G Master lens, one of the sharpest lenses in the Sony E mount line-up. It also features 11 circular aperture blades for that soft, creamy background bokeh that portrait photographers love. If you are on a budget, opt for the FE 85mm f/1.8. It offers the same focal length and excellent image quality, and is a great choice for those just starting out.
 © Steffen Böttcher | Sony α9 + FE 85mm f/1.8 | 1/160s @ f/11, ISO 50
Aperture Selection
The eyes are the soul of a portrait and should be the sharpest part of the image. However, you don’t want the rest of the face to be out of focus. Naturally, photographers will choose a very large aperture, such as f/1.4 or f/1.8 to make the background out of focus. This works nicely if you are shooting a full-length or mid-length portrait. However, when you are up close shooting a headshot, the very shallow depth of field at these large apertures may mean the eyes of the subject may be in focus, but the subject's nose, may be soft and out of focus. Don’t be scared of changing the aperture to f/2.8 or f/4 to increase the depth of field just enough to get the key facial features in focus. Don’t worry; you will still get a blurry background with these settings, particularly if your subject is far away from the background.
 © Terry Donnelly | Sony α1 + FE 135mm f/1.8 GM | 1/250s @ f/1.8, ISO 125
Shutter Speed and Steadyshot
Even when staying as still as possible, people move. We breathe in and out and sway as we maintain balance, this also goes for the photographer taking an image. Small movements may cause motion blur, particularly when photographing someone up close with a lens such as an 85mm portrait lens.
To prevent motion blur, switch on SteadyShot in your Sony Alpha camera and, if applicable, your E-mount lens. Use Eye AF to continuously correct for any back-and-forth motions. Finally, your choice of shutter speed will depend on the type of portrait you are taking. If your subject is sitting or leaning, you could shoot as low as 1/30th sec, but if you want to capture them laughing or some other type of reaction, you will need to select a much faster shutter speed. Use 1/125 sec as a starting point and adjust from there as needed.
 © Dennis Schmelz | Sony α7 IV + FE 24-70mm f/2.8 GM | 1/10s @ f/2.8, ISO 1600
Drive Mode
Continuous shooting mode is great for portraits. Human expression can change instantly, which can make a surprising difference to a portrait image. This is especially true if you are taking reaction shots, where you are looking to capture the subject laugh or smile.
Go into the Drive Mode menu and put your camera in Continuous Shooting mode. Then, select an appropriate shooting rate, which will depend on which Alpha camera you have. You probably won't want to select shooting at 10 or even 20fps, but between 3-7fps is a good rate for capturing the small changes in the subject's face.
 © Alice Greenfield | Sony α7 III + FE 50mm f/2.5 G | 1/500s @ f/3.5, ISO 80
Soft Skin
While we want the eyes to be as sharp as possible, having too much detail on the skin can be unflattering for some types of portraiture. Recent Sony Alpha cameras have Soft Skin effect mode, which can be found in the Shooting Menu. In this mode, the subject's face is detected within the image, and a softening effect is applied to the areas of skin to create a flattering portrait effect. There are Low, Medium, and High settings, we would recommend starting with the Low setting. This effect is only available for JPEG or HEIF images. If you are shooting Raw + JPEG, the raw images will not have the effect applied, which is great if you want to preview a JPEG with Soft Skin quickly but do more advanced retouching to a raw image.
 © Kate Kirkman | Sony α9 II + FE 50mm f/1.4 GM | 1/250s @ f/1.4, ISO 320